Written by Vera R. (Artiphon's Digital Marketer)
Orba is a simple tool made by very freaking smart people. Because of that, there are many hidden tricks that you (or even I) may not know unless you read through our lengthy manual. 😝
In this blog post, I'm going to share the top five things you didn't know Orba could do, so stretch out your fingers and get ready to learn some Orba combos.
(Maybe not that kind of combo.)
Let’s begin by saying that all of these tricks that I’m going to share here are ones you can do using the standalone device, no app required. Here it goes!
1. Changing Modes Quickly
I’m sure you already discovered that you can cycle between modes by pressing the A button.
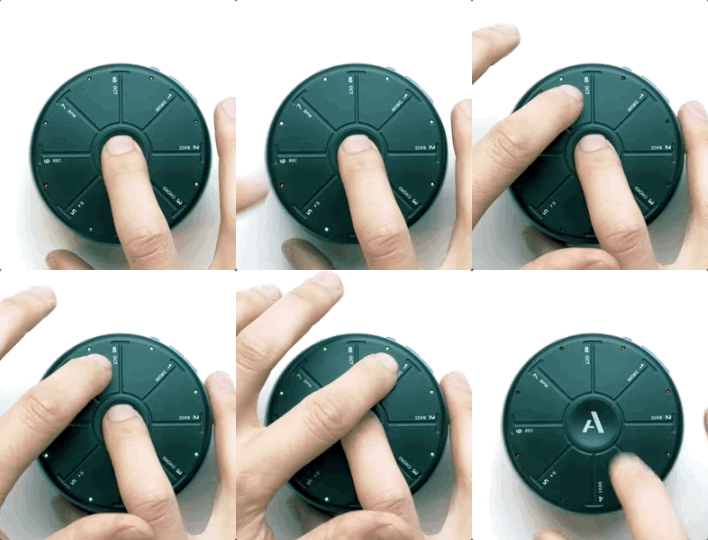
But if you want to take your Orba playing to the next level, the Orba pros will tell you that the best way to change modes is by holding A + the Mode you want to play. For example:
A + Drum (Pad 1)
A + Bass (Pad 2)
A + Chord (Pad 3)
A + Lead (Pad 4)

I know this may seem like a silly hack to lead with but hear me out. I’ll give you an IRL scenario.
Say you are bravely showing off your looping skills to your buddies, you are playing a walking bass line, and then you want to add a quick lead part to go with it. 👯
Well, you’d have to cycle through chord mode first, missing that perfect downbeat. By using this method, you will be able to skip over chord mode and go directly to lead, landing that perfect lead note on the beat. Sick right?
2. Erase Loops by Shaking
We love experimentation, so when the loop you recorded does not fit the vibe you want, you can easily delete it. And because we are Artiphon, we don’t just have one way to delete a part, but several. (I told y'all the people that make these things are smart.) 💁
To delete Hold A + Pad 6. You will notice Orba’s lights going around. These lights cycle with two colors, and each color has a different meaning:
Orange: Once the lights circle Orba one time, in orange, it will delete the loop of the mode in the current selection. For example, if you are in chord mode, it will delete the entire chord loop recorded. This can be a fun way to add an ending to your songs by slowly removing parts of a song until you have nothing left.
Red: If you keep holding A + 6, letting the lights go around again. After orange, you will see the lights turn red during the second cycle (this means that Orba is deleting your entire recording.)

The second way to delete a loop is by shaking Orba. This is highly inspired by our second favorite creative sketch tool (Orba obviously being the first 🤪), the Etch-A-Sketch. You can delete the loop of the current mode by Holding A and shaking Orba like an Etch-A-Sketch.

3. Changing Your Tempo
Tempo, BPM, clicker, timer? So many names makes my head hurt. 😵💫 But what does that all mean? If your metronome is enabled, you will hear a clicking sound when you record on Orba. This clicking noise is a musical timer, better known as a metronome. The first loud click is your downbeat and first beat of your meassure, and the next three are your upbeats.
Let’s give you another real-life example. Think about dancing-- how each beat represents a new dance move. You start at the first beat of the messure, 1 and keep flowing your moves through 2 hand punches, 3 kicks, and 4 head bobs. That’s essentially what the tempo does: it keeps track of your rhythm.
And once again in true Artiphon fashion, just like there are many ways to erase your song, there are multiple ways to change your tempo:
The Sliding Method: Simply, Hold A + Pad 7 without lifting and slide from pad 7 to pad 8 to increase BPM by 1 beat, swipe 2 pads from pad 7 to pad 1 to increase BPM by 2 beats, and swipe 3 pads to increase BPM by 5 beats. Swipe counterclockwise to decrease the BPM by the same increments.

The Tapping Method: This method is super intuitive. All you have to do is just feel the vibe of your song. Once you get that vibe dialed in, Hold A + Pad 7 - begin tapping Pad 7 while holding A to set your desired tempo.

Just for fun, let’s follow our new tempo by hitting that bass drum (Pad 1) on the downbeat and the snare (Pad 2) on the next upbeat. Continue filling in high-hats and other fun drum sounds on the 3, and 4 beats.
4. Changing Your Octave
Maybe these chords sound a bit too low and scary, or maybe they sound too high-pitched. You can easily change the octaves on Orba, and trust me, you will totally want to use this as you'll be able to elevate your songs to the next level by harmonizing and recording the same parts with different octaves on top of each other.
Changing your octave is similar to changing the tempo. It uses the sliding method. Just Hold A + Pad 8, and slide up and down to change the pitch to whatever your beautiful heart desires. Clockwise will make it higher, and counterclockwise will make it lower.

5. Volume-Per-Part Mixing
Ever recorded the perfect Orba loop, but that lead line is just piercing your ears because it’s too high and loud? You can easily lower and raise the individual volume of your loop parts!
While this one is quite the combo, trust me, it’s a “must-know.”

To begin mixing the audio volume of your loop, Hold A + the pad of the Mode you want to mix (like you're changing the Mode as previously discussed), and simultaneously toggle the volume up/down button. You will see the lights of your Mode light up on all of Orba’s pads (the color will correspond to the Mode you are in).
These lights indicate the volume levels from 0 - 100%. Any time you press the volume button, the volume will increase/decrease by 12.5% (or +/- 4 dBs). You can do this for every single part getting every level just right.
Tip: You can adjust the volume before or after you record your loop. 🙌
6. BONUS: Stem Songs
Anxious? Don’t know what to do with your hands or body? We wanted to create a quick way for everyone to express themselves musically. That’s where stems come in!
Simply, load a Stem Song from the Orba app (you will have to download these via an app USB connection initially) and hold any pad under any mode to experience a pattern of a song. You can jam and even layer these different patterns using different Modes, and you’ve got a sick song!

This blog was inspired by these tutorial videos:
Orba Function Chart
| Function | Combination |
|---|---|
| Switch to Drum mode | (A) + Pad 1 (DRUM) |
| Switch to Bass mode | (A) + Pad 2 (BASS) |
| Switch to Chord mode | (A) + Pad 3 (CHORD) |
| Switch to Lead mode | (A) + Pad 4 (LEAD) |
| Record | (A) + Pad 6 (REC) |
| Close a loop while recording | (A) |
| Stop recording | (A) + Pad 6 (REC) |
| Play/pause loop | (A) + Pad 5 (Play/Pause) |
| Restart playback from the beginning of the loop | Hold (A) + Pad 5 (Play/Pause) for 2 seconds). |
| Clear the loop on the current mode | Hold A + Pad 6 (Rec) until a series of red LEDs followed by a series of orange LEDs each make a complete cycle around Orba. Alternatively, hold A + Pad 6 (Rec) while shake Orba. |
| Clear all loops (in every mode) | Hold A + Pad 6 (Rec) until a series of red LEDs followed by a series of orange LEDs each make a complete cycle around Orba. Alternatively, hold A + Pad 6 (Rec) while shake Orba. |
| Change BPM | Hold A + Pad 7 (BPM) and slide clockwise (increase tempo) or counter-clockwise (decrease tempo) Alternatively, hold A and tap Pad 7 (BPM) at the desired tempo. |
| Octave up | Hold A + Pad 8 (Octave) and slide clockwise. |
| Octave down | Hold A + Pad 8 (Octave) and slide counter-clockwise |
| Change the volume of the selected part | Holding (A), press volume up or down. (Ex. If you want to change the volume of Drum mode only, while in Drum mode, hold (A) and increase or decrease volume.) |

